Have you ever received a bespoke gift basket containing items specially selected to match your lifestyle and situational needs? You may have wondered how the sender created such a special gift hamper. A lot of work goes into researching the persona, interests, and hobbies of the gift hamper’s recipient to collect the right gift items.
Are you thinking of the perfect way to treat someone you cherish to a special gift hamper but not sure how to create one? Creating personalized gift hampers is not a walk in the park, but you can create a standout gift basket when you have the resources and time.
Gift hampers can contain items in any format and type—from gift certificates and personal care items to movie or flight tickets to gadgets and accessories. High-quality items that complement the lifestyle and needs of the recipient show that you care and can go the extra mile to appreciate them. Create the perfect personalized gift hamper for a friend or loved one in the following easy ways:.
1. Choose Where to Pack Your Gift Hamper
Every gift hamper recipient will appreciate good packaging that appeals to the eye. One can store gift hampers in a container or basket, provided they are customized to suit the occasion. Many online retailers, craft stores, and home goods stores offer custom containers and baskets. When choosing a basket for storing gift hampers, consider their type, quantity, and weight.
The basket or container material should be durable and robust enough to withstand the weight of the items. Its color should match the aesthetics of the gift hamper. Ensure you buy high-quality Purely Gourmet gift hampers and grocery packaging materials for the best gifting experience.
2. Choose a Theme
A theme is a customized piece of decor that speaks the message of the occasion or event. Never go wrong with choosing one because it is what the recipient first sees when they receive the package. Even a friend or loved one will think twice if they receive a hamper packaged as a birthday gift on their wedding anniversary. It leaves them with more questions than answers, and they find it hard to trust you again.
Only decide on color and pattern customizations when done with the theme. There are basic rules to choosing a gift hamper’s theme that you must never forget. Always emphasize the occasion and its importance in the recipient’s life. For recipients with special interests and hobbies, choose a theme that reflects what they love. Be as creative with creating the gift hamper as you can. Add a bespoke note or handmade items if you can.
3. Collect the Items
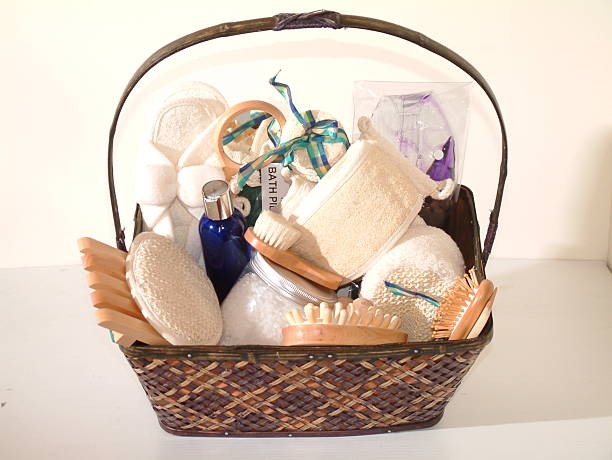
Since you now have a basket for keeping your gift hamper, it is time to collect the items. Remember, it is not about how many products you can get but how well they match the hobbies and interests of the recipient.
A customized gift hamper should thrill and satisfy the recipient while making them feel appreciated. If you send a gift hamper containing items the recipient has no interest in, you will create no memories, and they may not enjoy it after all.
For this reason, understand the person you want to surprise better. Be sure to know what they like and dislike, as well as their most desired current purchases. Choosing items that resonate with their current needs, hobbies, and lifestyle can create lasting memories.
4. Arrange the Items in the Basket
After collecting all the items, arrange them creatively in the basket. There is no correct or wrong way to do this, and no one-size-fits-all approach applies. However, always line the bottom of the hamper with decorative fabric or tissue paper. The tissue paper or fabric cushions the items inside the basket, preventing their damage. It adds a decorative touch to your hamper, boosting its visual appeal.
Additionally, lining the bottom helps to keep your gift items organized by separating them and ensuring you can easily find what you want. Make your hamper stand out by arranging the elements in the most creative way you can. Arrange items starting from the biggest to the smallest or vice versa. Use embellishments like ribbon to tie your hamper together.
5. Wrap Your Gift Hamper
Thus far, you have created a personalized gift hamper for your friend or loved one. Having arranged the items to your satisfaction, you now wrap the gift hamper. Start by choosing a wrapping paper complementing the gift hamper’s chosen theme. For those unsure about the wrapping paper to choose, brown and classic white papers will always do.
To completely cover the gift hamper, use enough wrapping paper. For patterned wrapping papers, use two sheets to keep the patterns intact. Use ribbon or tape to secure the wrapping paper, and don’t forget to add a personal touch. That could be a smaller gift or a few sprigs of greenery to make the hamper more attractive.
Rounding Up
Buying a pre-made gift hamper or creating one from scratch depends on you. The time at your disposal and your budget will guide this decision. You can read online tutorials to learn more about creating an excellent gift hamper. Always make sure the gift hamper is thoughtful and can always satisfy the curiosity and needs of the receiver.